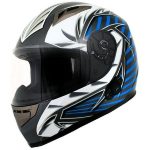
When investing in a new motorcycle helmet, one crucial factor to consider is the break-in period. A helmet that fits perfectly out of the box ensures optimal safety and comfort during your rides. But how long does it take to break in a motorcycle helmet? In this guide, we’ll delve into the nuances of helmet break-in, offering insights on how to make the process smoother and what to expect.
Understanding the Helmet Break-In Process
What Is Helmet Break-In?
Helmet break-in refers to the period during which the interior padding of a new motorcycle helmet conforms to the unique shape of your head. Unlike other gear, helmets are designed to provide a snug fit, which can initially feel tight or uncomfortable. This adjustment period ensures the helmet fits properly, maximizing both safety and comfort.
Why Is Break-In Important?
Properly breaking in your helmet is essential for several reasons:
- Safety: A well-fitted helmet provides better protection in the event of an accident. A helmet that conforms to your head’s shape can absorb impact more effectively.
- Comfort: A helmet that fits well reduces pressure points and increases comfort during long rides.
- Performance: A properly broken-in helmet helps maintain a stable fit, preventing it from shifting or moving around while you ride.
How Long Does It Take to Break In a Motorcycle Helmet?
Typical Break-In Period
Most motorcycle helmets take around 2 to 3 weeks to fully break in. This period allows the interior padding to compress and adapt to the contours of your head. The exact duration can vary depending on the helmet’s material and your head shape.

Factors Affecting Break-In Time
- Padding Material: Helmets with softer padding may break in faster than those with firmer materials.
- Helmet Fit: If your helmet is slightly too tight or too loose, the break-in period might be longer or shorter.
- Usage: Wearing the helmet frequently during the break-in period can speed up the process. However, ensure you’re not compromising safety by wearing an ill-fitting helmet.
Tips for Accelerating the Break-In Process
Wear Your Helmet Regularly
The best way to speed up the break-in process is to wear your helmet as much as possible. Regular use helps the padding mold to your head shape more quickly. For daily commuters or frequent riders, this can be a natural process.
Adjust the Fit
Ensure that your helmet is adjusted correctly. Most helmets come with adjustable straps and padding. Fine-tuning these adjustments can enhance comfort and expedite the break-in period. If you experience persistent discomfort, consult a professional for adjustments.
Use a Helmet Liner
A helmet liner can aid in breaking in your helmet. These liners provide additional cushioning and can help accelerate the padding’s adjustment to your head. Additionally, they can be removed and washed, maintaining the helmet’s hygiene.
Follow Manufacturer Instructions
Always follow the manufacturer’s recommendations for breaking in your helmet. Some brands provide specific guidelines to ensure the helmet conforms to your head correctly while maintaining its safety features.
Common Break-In Issues and Solutions
Pressure Points
If you experience pressure points, it’s a sign that the helmet is still adjusting. Wearing the helmet regularly should help alleviate these pressure points over time. For persistent issues, try using a helmet liner or consult the manufacturer for advice.
Tightness or Looseness
A helmet that feels too tight or too loose can affect both safety and comfort. If adjustments don’t resolve the issue, you might need a different size or model. Always prioritize a helmet that fits securely without compromising safety.
Helmet Odor
New helmets might develop an odor due to the materials used. Regular wear and proper ventilation can help minimize this issue. Additionally, cleaning the helmet’s interior with mild soap and water can reduce unwanted smells.
Maintaining Your Helmet Post Break-In
Regular Cleaning
Once your helmet is broken in, regular cleaning is crucial to maintain hygiene and comfort. Use a mild detergent and water to clean the interior padding and exterior shell. Avoid using harsh chemicals that can damage the helmet’s materials.
Inspect for Wear and Tear
Regularly inspect your helmet for signs of wear and tear. Check the padding, straps, and shell for any damage. Replacing worn-out components ensures your helmet remains effective in providing safety and comfort.
Storage
Proper storage extends the life of your helmet. Store it in a cool, dry place away from direct sunlight. Use a helmet bag to protect it from dust and accidental damage.
Additional Tips for Helmet Care
Invest in Quality
Investing in a high-quality motorcycle helmet can significantly impact the break-in process. Premium helmets often feature advanced materials and padding that conform to your head shape more efficiently. Consider helmet reviews and ratings when making your purchase to ensure you’re getting a product that offers both comfort and safety.

Avoid Extreme Temperatures
Extreme temperatures can affect the break-in process and overall helmet performance. Avoid exposing your helmet to direct sunlight or storing it in hot environments, as this can damage the padding and shell. Keep your helmet in a temperature-controlled environment to maintain its integrity.
Check for Fit After Break-In
Once the break-in period is complete, it’s a good idea to reassess the fit of your helmet. Make sure it still fits snugly and comfortably. If you notice any changes in the fit, it may be time to adjust the padding or consider a replacement.
Utilize Helmet Accessories
Consider using helmet accessories like cheek pad inserts or comfort liners to enhance fit and comfort. These accessories can provide a customized fit and additional cushioning, making your helmet even more comfortable after the break-in period.
Enhancing Helmet Fit and Comfort
Custom Fitting Services
For the best results, consider using custom fitting services offered by many motorcycle gear shops. These services can tailor your helmet to your unique head shape, ensuring an optimal fit and comfort. Custom fittings can also address any specific issues you might encounter during the break-in period.
Helmet Sizing Tips
When choosing a helmet, proper sizing is crucial. Measure your head accurately using a tape measure, and refer to the manufacturer’s sizing chart to select the right size. A helmet that is too large or too small can affect both safety and comfort, making it important to get the size right from the start.
Adjusting Helmet Padding
Many helmets come with removable and adjustable padding. If your helmet feels tight or uncomfortable during the break-in period, adjusting or replacing the padding can help. Some helmets offer extra padding options or cheek pad replacements to achieve a more customized fit.
Utilizing Ventilation
Proper ventilation can enhance comfort by reducing heat and moisture buildup inside the helmet. Look for helmets with adjustable ventilation systems that allow you to control airflow. This feature helps keep your head cool and comfortable, especially during long rides.
Helmet Safety Certifications
Importance of Certifications
When selecting a motorcycle helmet, ensure it meets safety certifications such as DOT (Department of Transportation), ECE (Economic Commission for Europe), or SNELL standards. These certifications indicate that the helmet has undergone rigorous testing to ensure it provides adequate protection in case of an accident.
Checking Certification Labels
Always check the certification labels on your helmet to confirm it meets the necessary safety standards. A certified helmet not only provides better protection but also gives you peace of mind while riding.
Upgrading for Advanced Safety Features
Consider helmets with advanced safety features such as MIPS (Multi-Directional Impact Protection System) or integrated communication systems. These features can enhance both protection and convenience, offering additional benefits during your rides.
Understanding Helmet Lifespan
Helmet Longevity
The lifespan of a motorcycle helmet depends on various factors, including usage, maintenance, and the quality of the helmet. On average, helmets should be replaced every 5 to 7 years. If your helmet has been involved in an accident or shows signs of significant wear, it’s time for a replacement.

Signs of Wear and Tear
Regularly inspect your helmet for signs of wear and tear such as cracks in the shell, damaged padding, or degraded straps. These signs indicate that the helmet’s protective features may be compromised, and a replacement should be considered.
Maintenance Tips for Longevity
To extend the life of your helmet, follow proper maintenance practices. Clean the helmet regularly, store it in a cool, dry place, and avoid exposing it to extreme temperatures or direct sunlight. Proper care ensures that your helmet remains effective and comfortable throughout its lifespan.
Final Thoughts
Breaking in a motorcycle helmet is a crucial step to ensure both safety and comfort. By understanding the break-in process, following the right steps, and addressing common issues, you can enhance your riding experience. Remember, a well-fitted helmet is not just about comfort; it’s about your safety on the road.


