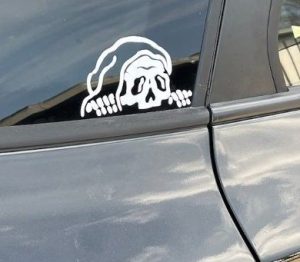
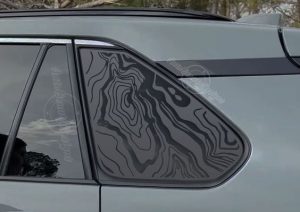
So you’ve found the perfect sticker to personalize your car window – a funny meme, a favorite band’s logo, or maybe a message that showcases your unique style. But before you slap it on the glass with glee, there are a few things to consider for a flawless application.
This guide will equip you with the knowledge and techniques to put stickers on your car window like a pro. From choosing the right sticker to ensuring a smooth, bubble-free finish, we’ll cover everything you need to know for a successful sticker application.
Selecting the Perfect Sticker for Your Car Window
Not all stickers are created equal, and the type of sticker you choose can impact the application process. Here’s a breakdown of some common options:

- Vinyl Stickers: These are the most popular choice for car windows. They are durable, weatherproof, and come in a wide variety of designs and colors.
- Die-Cut Stickers: These stickers are cut to the exact shape of the design, eliminating any unwanted clear background material.
- Bumper Stickers: While traditionally meant for bumpers, these larger vinyl stickers can also be applied to car windows.
Additional Considerations:
- Size: Consider the size of the sticker in relation to your car window. A large sticker might overwhelm a smaller window, while a tiny sticker might get lost on a larger window.
- Adhesive Strength: Choose a sticker with an adhesive strength suitable for car windows. You want something that will stay put while being easy enough to remove later without damaging the glass.
- Material Quality: Opt for high-quality vinyl stickers for optimal durability and weather resistance.
If you’re unsure about the sticker’s adhesive strength, ask the seller or manufacturer for clarification.
Preparing Your Car Window for Sticker Application
A clean and well-prepared surface is key for a smooth and long-lasting sticker application. Here’s how to get your car window ready:

- Clean the Window Thoroughly: Wash the window with soap and water to remove any dirt, dust, or grease. Dry the window completely with a clean, lint-free microfiber cloth.
- Degrease the Surface (Optional): For extra adhesion, especially for older or heavily used windows, you can use a rubbing alcohol wipe to remove any remaining oils or residues that might affect the sticker’s bond.
When using rubbing alcohol, work in a well-ventilated area and avoid contact with eyes.
Applying the Sticker with Precision
Now comes the fun part – applying the sticker! Here’s a step-by-step guide to ensure a flawless application:
- Position the Sticker: Carefully position the sticker on the desired location on the window. Once you’re happy with the placement, hold it lightly in place with one hand.
- Use the Hinge Method (Optional): For larger stickers, you can use the hinge method for easier application. Peel a small portion of the backing paper (about an inch) and fold it back onto itself, creating a hinge. This allows you to position the sticker without accidentally touching the adhesive.
- Squeegee Out the Bubbles: Using a credit card or a squeegee wrapped in a microfiber cloth, gently squeegee the sticker from the center outwards. This will smooth out any air bubbles trapped underneath the sticker.
- Remove the Backing Paper: Once all the bubbles are gone, slowly and carefully remove the remaining backing paper while holding the sticker in place with your other hand.
- Apply Pressure: Apply gentle but firm pressure all over the sticker to ensure a strong bond with the window.
If you notice a small air bubble after applying the sticker, you can carefully pierce it with a needle and then smooth it out with your squeegee.
Taking Care of Your Stickered Window
Once your sticker is applied, here are some tips to keep it looking its best:

- Avoid Washing the Window for 24 Hours: Allow the adhesive to fully cure by avoiding washing the window for at least 24 hours after application.
- Hand Wash Only: When washing your car, opt for hand washing instead of an automatic car wash. The harsh brushes in automatic car washes can damage the sticker.
- Minimize Sun Exposure: While most vinyl stickers are UV resistant, prolonged exposure to direct sunlight can fade the colors over time. Consider parking in shaded areas whenever possible.
Troubleshooting Common Sticker Application Problems
Even with careful preparation, you might encounter some minor issues during application. Here’s how to tackle them:
- Misaligned Sticker: If you accidentally misalign the sticker while applying, carefully peel it off (it should come off easily if the adhesive hasn’t cured yet). Reposition the sticker and try again.
- Stubborn Air Bubbles: If a large air bubble persists after squeegeeing, carefully use a sharp needle to pierce it at its edge. Then, gently press the air out towards the hole using your finger or squeegee. Be careful not to press too hard or you might tear the sticker.
- Sticker Residue: If there’s some leftover adhesive residue after removing the backing paper, you can use a bit of rubbing alcohol on a cotton swab to remove it gently. Remember to test the rubbing alcohol on an inconspicuous area first to ensure it doesn’t discolor the window tint (if applicable).
Level Up Your Sticker Game: Creative Ideas for Car Window Decoration
With the knowledge of proper application techniques, you can unleash your creativity and personalize your car window with various stickers. Here are some inspirational ideas:

- Showcase Your Passions: Love music? Display your favorite band’s logo or a silhouette of a guitar. Sports enthusiast? Sport your team’s logo or a motivational quote related to your favorite sport.
- Funny Touches: Add a touch of humor with a funny meme or a witty saying that reflects your personality.
- Family Fun: Decorate your car sticker with stickers representing your family members’ hobbies or interests.
- Seasonal Flair: Get into the holiday spirit with festive stickers or celebrate a special occasion with a temporary sticker.
When choosing stickers for your car window, ensure they don’t obstruct your vision while driving.
Spruce Up Your Ride with Confidence

By following these tips and techniques, you can confidently apply stickers to your car window and showcase your unique style. With a little preparation and the right tools, you can achieve a flawless application that will last for years to come. So, unleash your creativity, choose the perfect sticker, and get ready to personalize your ride!


