Hitting the open road on a motorcycle is an exhilarating experience, offering a sense of freedom and connection to the world around you. But before you twist the throttle and zoom off, prioritizing safety is paramount. Your helmet is your first line of defense in a crash, and ensuring a proper fit is crucial for optimal protection.
This comprehensive guide will equip you with the knowledge and steps on how to measure a motorcycle helmet for a snug, comfortable, and most importantly, safe ride.
Why a Proper Motorcycle Helmet Fit Matters
Motorcycle helmets are designed to absorb impact and protect your head in the event of an accident. However, a loose-fitting helmet can move around during a crash, reducing its effectiveness and potentially causing serious injuries. Conversely, a helmet that’s too tight can be uncomfortable and lead to headaches or fatigue on longer rides.
Here’s why a proper helmet fit is essential:
- Optimal Impact Absorption: A properly fitted helmet distributes the force of an impact evenly across its shell, maximizing its protective capabilities.
- Reduced Risk of Injury: A snug fit prevents the helmet from rotating or shifting during a crash, minimizing the risk of head injuries.
- Enhanced Comfort: A comfortable helmet promotes a safe riding experience. You’ll be less likely to be distracted by discomfort and can focus on the road.
- Improved Peripheral Vision: A well-fitting helmet ensures unobstructed peripheral vision, crucial for maintaining situational awareness while riding.
Tools of the Trade: What You’ll Need
Before diving into the measuring process, gather these essential tools:
- Soft Measuring Tape: A flexible fabric tape measure is ideal for comfortably measuring your head. Avoid using a metal tape measure, as it can be uncomfortable and potentially cause injuries.
- Mirror: Having a mirror handy allows you to ensure the tape measure is level around your head.
- Friend (Optional): An extra set of hands can be helpful for holding the tape measure in place and ensuring an accurate measurement.
Taking the Measure: A Step-by-Step Guide
Now that you have the necessary tools, let’s get started on measuring your head for a motorcycle helmet:
- Locate the Sweet Spot: The key measurement point is just above your eyebrows, approximately halfway between your forehead and the crown of your head. This is typically the widest part of your head.
- Wrap and Measure: With the measuring tape held level, gently wrap it around your head, ensuring it sits comfortably above your eyebrows and goes around the fullest part of your head.
- Read the Measurement: Take note of the measurement where the tape measure meets itself. It’s recommended to take the measurement two or three times to ensure accuracy. If you get different measurements, use the largest one for reference.
Don’t cheat! A snug but comfortable fit is ideal. Avoid the temptation to fudge the numbers for a looser feel.
Understanding Motorcycle Helmet Sizing Charts
Once you have your head circumference measurement, it’s time to consult the helmet manufacturer’s sizing chart. Sizing charts typically convert head circumference measurements into corresponding helmet sizes (e.g., Small, Medium, Large).
Here are some key points to remember when using a sizing chart:
- Manufacturer Variations: Sizing charts can vary slightly between different helmet brands. It’s crucial to consult the specific chart for the helmet you’re interested in purchasing.
- Head Shape Matters: Head shape can also play a role in fit. While head circumference is a primary factor, some brands offer different fit options (e.g., oval, round) to accommodate various head shapes.
- When in Doubt, Size Down: If your head circumference falls between two sizes on the chart, it’s generally recommended to choose the smaller size. You can always add padding for a more customized fit.
Sizing charts are a helpful starting point, but a test fitting is crucial for ensuring a perfect fit.
The Ultimate Test: Trying on the Motorcycle Helmet
After identifying your potential helmet size based on the sizing chart, it’s time for the real test – trying on the helmet! Here’s what to expect:
- Snug but Comfortable: The helmet should feel snug but comfortable when placed on your head. It shouldn’t cause any pressure points or feel loose enough to move around easily.
- The Cheek Pad Check: With the helmet on, try to gently move your head from side to side. Your cheeks should feel snug against the padding, but not so tight that it causes discomfort.
- The Brow Test: Look down and ensure the bottom of the helmet doesn’t rest on your nose or obstruct your vision. There should be a slight gap between your brow and the helmet’s interior.
The Final Touches: Achieving a Perfect Helmet Fit
After the initial try-on, some adjustments might be needed to achieve an ideal fit. Here’s how to fine-tune the feel of your helmet:
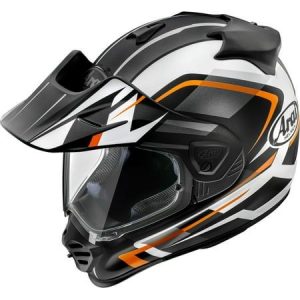
- Helmet Liners: Many helmets come with removable or adjustable liners. If the helmet feels slightly loose, consider replacing the liner with a thinner one for a tighter fit.
- Cheek Pads: Some helmets offer interchangeable cheek pads in different thicknesses. If your cheeks feel overly compressed, explore options for thicker pads for a more customized fit.
- Chin Strap Security: The chin strap should be snug but not constricting. You should be able to fit two fingers comfortably between the strap and your chin.
Don’t hesitate to seek assistance from a qualified salesperson at a motorcycle gear store. They can provide expert guidance on helmet fit and ensure you find the perfect helmet for your head shape and riding style.
Beyond the Measurement: Additional Considerations for Motorcycle Helmet Selection
While a proper fit is paramount, there are other factors to consider when choosing a motorcycle helmet:
- Helmet Type: There are various motorcycle helmet styles available, each catering to specific riding needs. Popular options include full-face helmets, modular helmets, half helmets, and dual-sport helmets. Research the different types to determine which best suits your riding style and preferences.
- Safety Features: Look for helmets that meet safety standards set by organizations like the Department of Transportation (DOT) or Snell Memorial Foundation. Consider additional safety features like a double D-ring closure system for optimal security.
- Ventilation: Proper ventilation is crucial for comfort, especially on hot days. Look for helmets with vents that allow for adequate airflow to prevent excessive sweating.
- Visor Options: Choose a helmet with a visor that offers good clarity and scratch resistance. Consider features like an anti-fog coating or a sun shield for added comfort and visibility.
- Noise Reduction: Motorcycle helmets can generate some wind noise. Look for helmets with noise-dampening features for a quieter riding experience.
Invest in a high-quality helmet that provides optimal protection, comfort, and the features you need for a safe and enjoyable ride.
Equipping Yourself for the Ride
Now that you’re armed with the knowledge on how to measure a motorcycle helmet and additional factors to consider, it’s time to find your perfect helmet! Here are some steps to get you started:
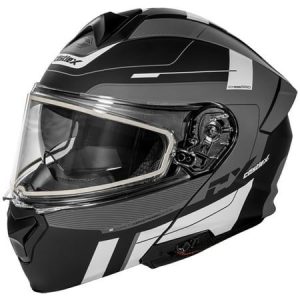
- Measure Your Head: Grab your measuring tape and follow the steps outlined above to determine your head circumference.
- Research Helmet Options: Explore different motorcycle helmet styles, brands, and features to narrow down your choices.
- Visit a Gear Store: Head to a reputable motorcycle gear store to try on helmets and get expert advice on fit and selection.
- Prioritize Safety: Don’t compromise on safety. Choose a helmet that meets safety standards and offers the protection you deserve.
Invest in Your Safety: Shop for Your Perfect Motorcycle Helmet Today!

